
Nine Week Project #1- Bill Gates vs. Steve JObs... The epic Battle
This GIF was created using brushes(of Steve Jobs' face and Bill Gates' face), text, and multiple variations and designs for each. The first step in this process was to define Bil Gates' face as a brush preset and the to define Steve Jobs' face as a brush preset. Then I opened a new document and filled it in with a black colored background. I added the text, "An Epic Battle..." . Then, I added a stamp of Bill Gates' face in the lower right hand corner. To copy this layer, I used Ctrl+J. On the first layer, I copied the text and added a "reflection" layer. I did this by flipping the text vertically and then erasing the lower parts of the words. On the second layer, I added another stamp, directly on top of the first, then copied it(using Ctrl+J), and continued this process for three more layers. I then copied all the previous layers and put them in opposing order. I then repeated this exact process with the Steve Jobs stamps. At the end of this process I merged the text layers with the background layer for both Bill Gates and Steve Jobs. To turn the collection of images into a GIF, I opened up the timeline menu using the windows dropdown and created a frame for each slide. I set the speed of each slide at .2 and so it gave the faces of Bill Gates and Steve Jobs this fade-in-fade-out effect.
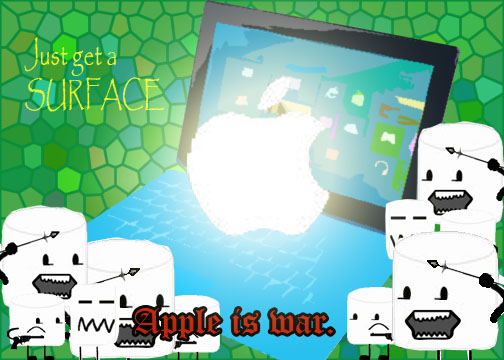
nine Week Project #2 - Battle of le Fluff
The first step was to find a picture of a cartoon gun and fill it in with black. Secondly, I found acartoon marshmellow which I then copied the image of the gun onto so that it looked like it was holding the gun. I used the magic eraser to remove any of the black backround and then merged the two layers. Then I used the brush tool to create my own "legs". To make another version of the marshmallow warrior, I took the same marshmallow image and then I deleted the mouth and face and created my own using the pencil tool. I blurred the mouth and eyes to make then blend in with the surrounding better. Next, I created another marshmallow, by simply opening a new layer(file->new layer) and drawing the shape of a marshmallow using the brush tool. On this last marshmallow, I added a squiggly line to be the angry mouth and squinty eyes. Next, I opened a blank new layer and filled it in randomly, using the brush, with different types of greens etc. Then, I clicked on filters->filter gallery->texture->stained glass. I went back to the marshmallow image and selected it using the marquee tool from the top of the toolbar on the left. I selected it, pressed Ctrl+C and switched back over to my "stained glass" layer. I pressed Ctrl+V and then Ctrl+T and adjusted the image down to the bottom left corner. Click on the check mark in the top right of the screen. I copied the other three images into the stained glass layer as I had the first marshmallow. Once they were all ther, I pressed Ctrl+T for each of them and made them smaller or larger by dragging the corner of the box that appeared, to my liking. Add as many marshmallows as you desire. (I used five) Then, I selected all the layers aside from the "stained glass" layer and pressed Ctrl+E. This Merges the layers so that when I press Ctrl+J they all go together and create one new, copied, layer. Once you have copied the layer, press Ctrl+T again and then move the three images to the right hand side of the screen. Click the check mark in the top right of the screen. Press Edit->transform->flip horizontal. Then press Ctrl+T again. Move the marshmallows to where they fit well in the bottom right of the image. Click the check in the top right of the screen(any time you use the Ctrl+T feature, you must do this).You have now established the two sides of your marshmallow army. Next, open an image of the apple logo. My logo had a black background, so I used the magic eraser to get rid of the black(the magic eraser is located in the left-hand toolbar). Copy the logo into the other image as you did with the marshmallows(select tool, select, Ctrl+C, switch frames, Ctrl+V). Ctrl+T to make the image larger and center it on the screen. Then to add the glow effect, select layer from the top toolbar->layer styles->outer glow. Leave it on the same color yellow, but adjust the spread to 13 and the size to 144.Then press ok. Next, select the text box icon(it is located towards the bottom of the left hand tool bar), In the bottom of the screen, draw a text box and in it, write, apple si war. Then change the font to a deep red and put it in old English font. Both of these veriables are located in the top tool bar.
SCORPIONS!!
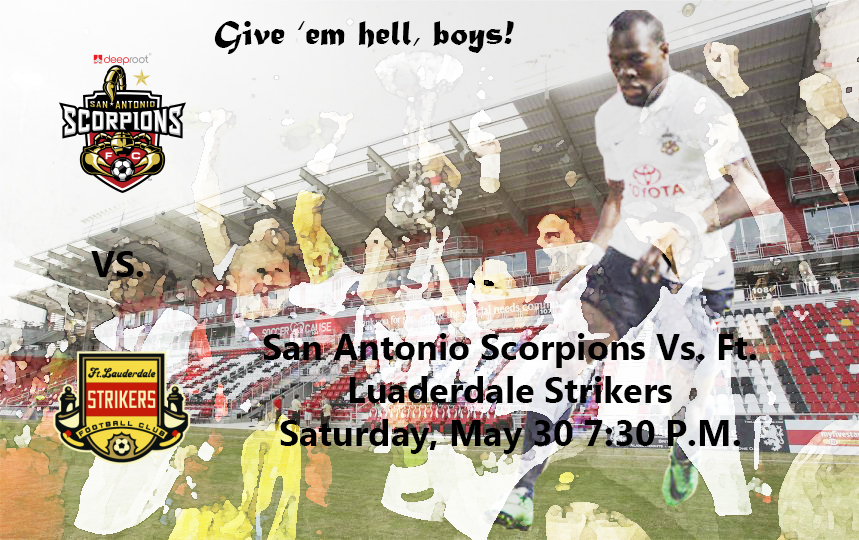
- Open a picture of the scorpions stadium, the
NASL 2014 victory photo, Billy Forbes, the San Antonio Scorpions Logo, and the
Ft. Lauderdale Strikers Logo in Photoshop.
- Copy the NASL 2014 victory photo onto the
picture of the stadium. Transform it so that it fits right in line with the
stadium photo.
- Set the eraser at 50% opacity and erase the
image. Then, go to filter>artistic> watercolor.
- Cut out the picture of Billy Forbes and copy it
into the picture with the stadium and the victory photo.
- Transform the photo so that it fits, and is in
the top right hand corner of the screen.
- Billy Forbes is a dark man, so I would suggest
adding brightness to the layer that he is on so that you can see the black text
later. To add brightness to a photo select the layer, then click on the half
shaded circle at the bottom of the screen and click brightness and contrast. Then
slide the brightness dial up… ALL THE WAY!
- Then merge together your three layers and do the
same thing. (In my case they were very dark pictures, so I wanted them to be
very bright.)
- Copy the Ft. Lauderdale strikers logo into the
project. Transform it so that it is in the bottom left hand side of the screen.
Make sure it is in the bottom, where it is dark, harder to see, and clearly
less important.
- Copy the scorpions logo on the project and place
it above the ft. Lauderdale strikers logo in the bright, white, clearly visible
space.
- Using
the text tool, create a text box in between the two logos and write “VS.” in
Microsoft New Tai Lue, size 36, black.
- Transform
this text box so that it is centered between the two logos.
- Then
create another text box where you write the details of the match: “San Antonio
Scorpions vs. Ft. Lauderdale Strikers Saturday, May 30 7:30 P.M.” In the same kind of formatting as the “VS.”.
Center this text and transform it so that it is in the bottom right hand side
of the screen.
- Then
create another text box, this time using the font Matura MT Script, size 36,
black. Write: “Give ‘em hell, boys!”
- Transform
this and center it at the top of the screen where it is clearly visible.
- GET
PUMPED!! YOU DID IT!!
Baleerinas across the sun
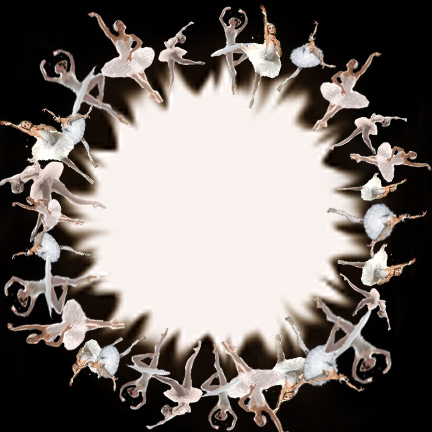
- Open a new project in Photoshop. Make it W:6
H:1.5 or something that is very wide and not very tall. Fill the background
black and and create a rectangle at the top of the screen.
- Press ctrl+J five times to create six of these
same layers.
- using the smudge tool, move the white around
towards the bottom of the screen on each of the layers. Make it look kinda like
flames. Do this on each of the layers.
- On each of the layers create a different kind of
orange color balance. To create a color balance, click on the “pokemon ball” at
the bottom of the screen, and adjust to color levels to suit your liking.
- Create anew project that is a squar with the
same width as your flames.
- Select the flames from the first layer of the
flames project and copy it into the other project. Repeat for each layer.
- Fill in the background of the second project
black by sleecting black in the spot of the color selections in the left hand
side of the screen using Ctrl+ Backspace
- In the second project, using Ctrl + T transform
each layer and move it up so that it is at the top of the screen.
- Filter> distort> polar coordinates on top
layer
- Transform it so that it takes up the whole
project space.
- Repeat for each layer
- Tip: there may a be a circular discoloration
around the “suns” that you have created. TO remove this, add a background and use the clone tool. Press
Ctrl+ J 5 times when the background layer is selected. Move each of these
layers underneath a “sun layer”.
- Using Ctrl+E(Merge down) merge each of the sun
layers with their corresponding background llayer.
- use the clone tool to make the background and
the discolored circles appear to belong together. Press Alt on wherever you
want the color to pick up from them click for where you want it to go. Set the
opacity at about 80% so that it look natural. Use this technique around the
outsides of the circle, but do not try to erase to color completely.
- Repeat this technique for each of the sun
layers. Make sure to hide the layers above the layer that you are working on so
that you can see what you’re doing.
- Find several pictures of ballerins( I suggest
about 5). Open them all in photoshop, and using the magic eraser tool, remove
any backround colors or images. (if the magic eraser is erasing part of the
image, use the regular eraser and outline that area, then use the magic eraser
tool)
- Copy the first image into photoshop and place it
on top of the first layer. Copy it 5 times and move a copy of the image on top
of each sun layer.
- Hide all the sun layers except the first and
move(using Ctrl+T: Transform) each readjust each copy of the image so that it
is ina different position and place around the sun. Make sure that the image that is above sun
layer two is the second to go around the sun; for example, if on the first sun
layer, the ballerina image is in the top left corner, layer two’s ballerina
should be down on the left of the sun.
- Repeat this step for each of the images of the
ballerinas, spacing them out as needed. This is time consuming, but once you
are finished, the sun should be surrounded by the ballerinas.
- Merge the first sunlayer with the first copy of
each ballerina, the second copy of the second ballerina, the third copy of the
third ballerinas, and so on. Repeat this f[process for each sun layer.
